In this article, we'll take a look at how we can modify the attributes, classes, and styles of HTML element nodes.
Modifying Attributes
Attributes are often used in HTML to provide additional information about an element. Some common examples are the src attribute of an img tag, the href of an a tag, as well as class, id and style. You may also have seen attributes beginning with data-, these are custom attributes that we can also modify.
The methods we have in JavaScript for modifying element attributes are:
hasAttribute() — Returns a Boolean.
getAttribute() — Returns the value of a specific attribute.
setAttribute() — Adds or updates the value of a specific attribute.
removeAttribute() — Removes an attribute from an element.
Let’s use the following HTML as our example:
<!DOCTYPE html>
<html lang="en">
<body>

<img src="https://res.cloudinary.com/trobes/image/upload/c_scale,w_400/v1549941322/before.png">

</body>
</html>
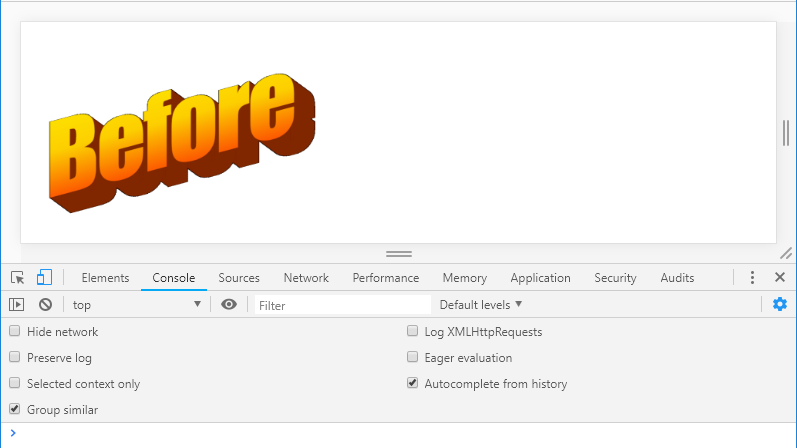
Open up the console and test out the attribute methods:
// Assign image element
const image = document.querySelector('img');
image.hasAttribute('src'); // true
image.getAttribute('src'); // returns the src link
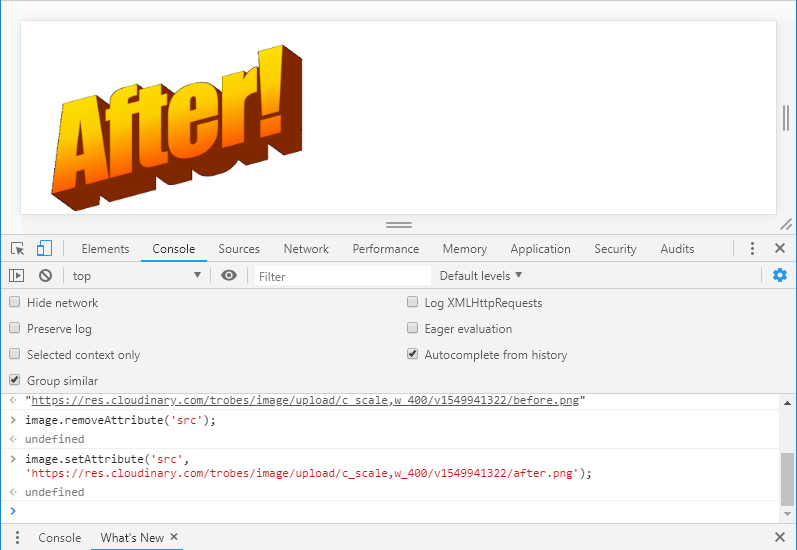
image.removeAttribute('src'); // removes the src
And let's use setAttribute() to assign a new image to our src:
image.setAttribute('src', 'https://res.cloudinary.com/trobes/image/upload/c_scale,w_400/v1549941322/after.png');
The hasAttribute() and getAttribute() methods are often used with conditional statements, while setAttribute() and removeAttribute() are more often used to directly modify the DOM.
Modifying Classes
When working with CSS, we use classes to apply styles to multiple elements. Let’s take a look at how we can work with the class attribute in JavaScript, using className and classList.
className — Gets or sets the class value.
classList.add()— Adds class values.
classList.toggle() — Toggles a class on or off.
classList.contains() — Checks if a value exists.
classList.replace() — Replaces old value with a new one.
classList.remove() — Removes a value.
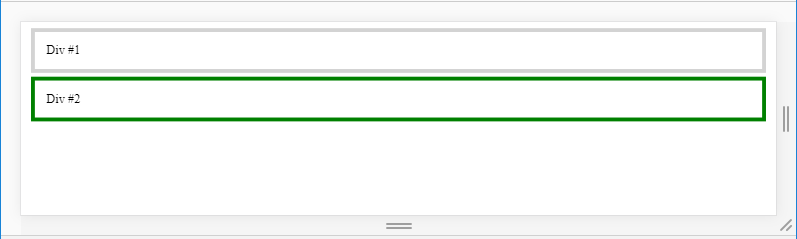
Let’s work with each of these methods in the following example:
<!DOCTYPE html>
<html lang="en">
<style>
    .active {
        border: 5px solid green;
    }
    .alert {
        border: 5px solid red;
    }
    .hidden {
        display: none;
    }
    div {
        border: 5px solid lightgrey;
        padding: 15px;
        margin: 5px;
    }
</style>
<body>
    <div>Div #1</div>
    <div class="active">Div #2</div>
</body>
</html>
And here’s the initial HTML output:
We use className to assign values to classes:
// Select div #1
const div = document.querySelector('div');

// Assign the alert class to div #1
div.className = 'alert';
Now the alert class defined in our HTML has been assigned to the first div:
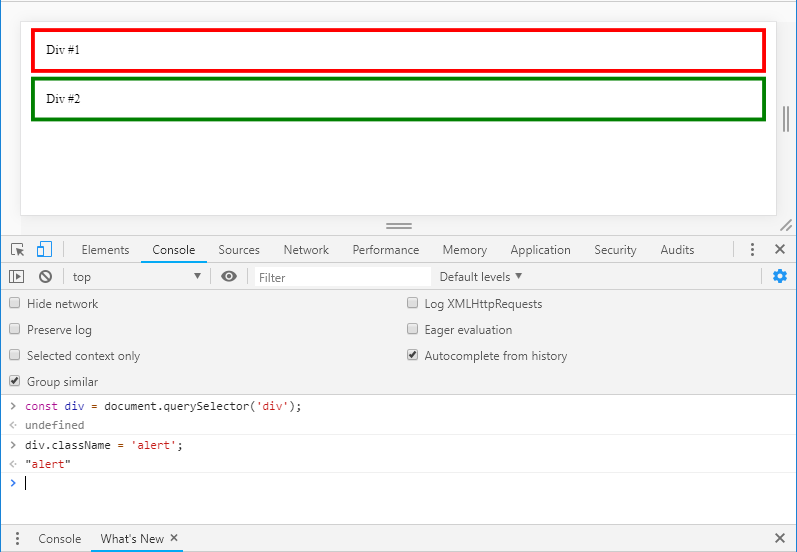
This will override any existing classes on the element. You can add multiple classes using className, if you separate the class names to be applied with spaces.
The other way to modify our classes is with the classList property, and it has a few very useful methods:
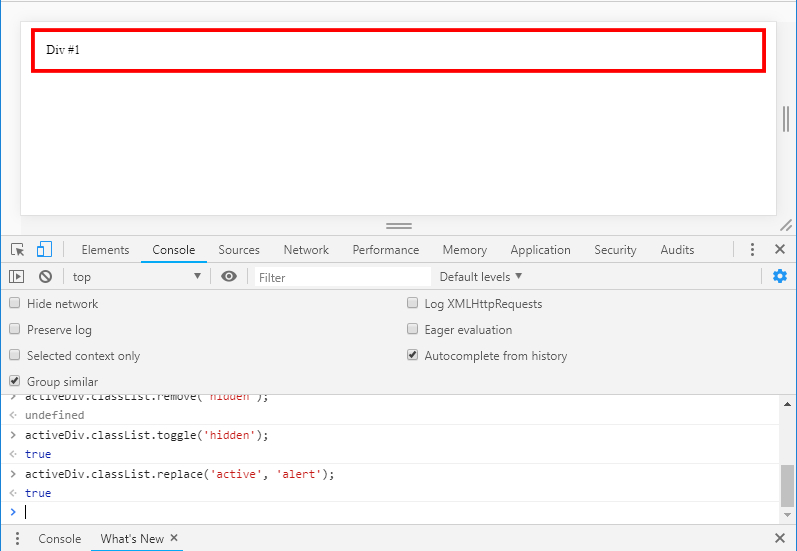
// Select div #2 by its class name
const activeDiv = document.querySelector('.active');

// Add the hidden class
activeDiv.classList.add('hidden');

// Remove the hidden class
activeDiv.classList.remove('hidden');

// Switch between hidden true and false
activeDiv.classList.toggle('hidden');

// Replace active class with alert class
activeDiv.classList.replace('active', 'alert');
After running through these methods, our HTML will render like so:
Note: Using classList.add() will add a new class to the list of existing classes (remember className would override any existing classes). You can also add multiple classes as comma-separated strings.
Modifying Styles
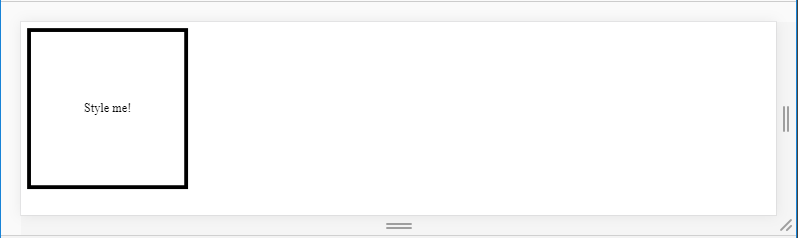
Typically styles are added via separate CSS stylesheets, however, there are times when we might want to use an inline style — and it's useful to know how we can modify it directly with JavaScript! Let’s demo this with the following HTML:
<!DOCTYPE html>
<html lang="en">
<body>
    <div style="height: 200px;
                width: 200px;
                border: 5px solid black;
                display: flex;
                justify-content: center;
                align-items: center;">Style me!</div>
</body>
</html>
Our initial output:
When working with CSS properties in the DOM, we use camelCase. So instead of using dashes as we would with CSS e.g.border-radius, we use camel case e.g. borderRadius. Where our first word is in lower case and any subsequent words are capitalized.
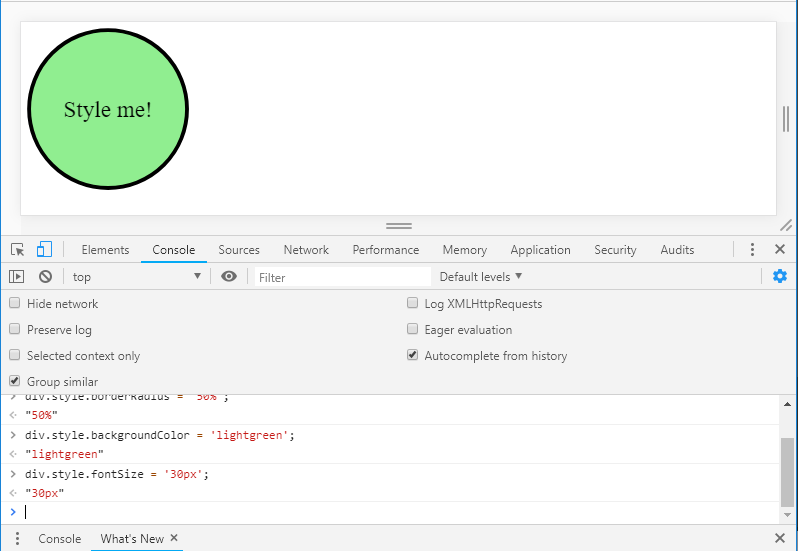
// Select the div
const div = document.querySelector('div');

// Make div into a circle, change color and font size
div.style.borderRadius = '50%';
div.style.backgroundColor = 'lightgreen';
div.style.fontSize = '30px';
Note: We could use setAttribute()to modify our styles eg. div.setAttribute('style', 'border-radius: 50%'); However, this will remove all existing inline styles. So it’s much better to use the style attribute directly.
Our output after adding these styles:
Of course, if we have multiple style changes to apply to an element, it’s best to apply them to a class in your CSS and just add the new class to the element via JavaScript 🆒.
Related Posts:

A little about me..
Hey, I’m Tim! 👋
I’m a freelance business owner, web developer & author. I teach both new and experienced freelancers how to build a sustainable and successful freelancing business. Check out my Complete Guide to Freelancing if you'd like to find out more.
While you're here, you can browse through my blogs where I post freelancing tips, code tutorials, design inspiration, useful tools & resources, and much more! You can also join the newsletter, or find me on X.
Thanks for reading! 🎉